User’s guide
If you are familiar with web development, you may not be accustomed to the usage of PyWebIO described below, which is different from the traditional web development pattern that backend implement api and frontend display content. In PyWebIO, you only need to write code in Python.
In fact, the way of writing PyWebIO applications is more like writing a console program, except that the terminal here
becomes a browser. Using the imperative API provided by PyWebIO, you can simply call put_text(), put_image(),
put_table() and other functions to output text, pictures, tables and other content to the browser, or you can call
some functions such as input(), select(), file_upload() to display different forms on the browser to get
user input. In addition, PyWebIO also provides support for click events, layout, etc. PyWebIO aims to allow you to use
the least code to interact with the user and provide a good user experience as much as possible.
This user guide introduces you the most of the features of PyWebIO. There is a demo link at the top right of the example codes in this document, where you can run the example code online and see what happens.
Input
The input functions are defined in the pywebio.input module and can be imported using from pywebio.input import *.
When calling the input function, an input form will be popped up on the browser. PyWebIO’s input functions is blocking
(same as Python’s built-in input() function) and will not return until the form is successfully submitted.
Basic input
Here are some basic types of input.
Text input:
age = input("How old are you?", type=NUMBER)
After running the above code, the browser will pop up a text input field to get the input. After the user completes the input and submits the form, the function returns the value entered by the user.
Here are some other types of input functions:
# Password input
password = input("Input password", type=PASSWORD)

# Drop-down selection
gift = select('Which gift you want?', ['keyboard', 'ipad'])

# Checkbox
agree = checkbox("User Term", options=['I agree to terms and conditions'])

# Single choice
answer = radio("Choose one", options=['A', 'B', 'C', 'D'])

# Multi-line text input
text = textarea('Text Area', rows=3, placeholder='Some text')

# File Upload
img = file_upload("Select a image:", accept="image/*")
Parameter of input functions
There are many parameters that can be passed to the input function(for complete parameters, please refer to the function document):
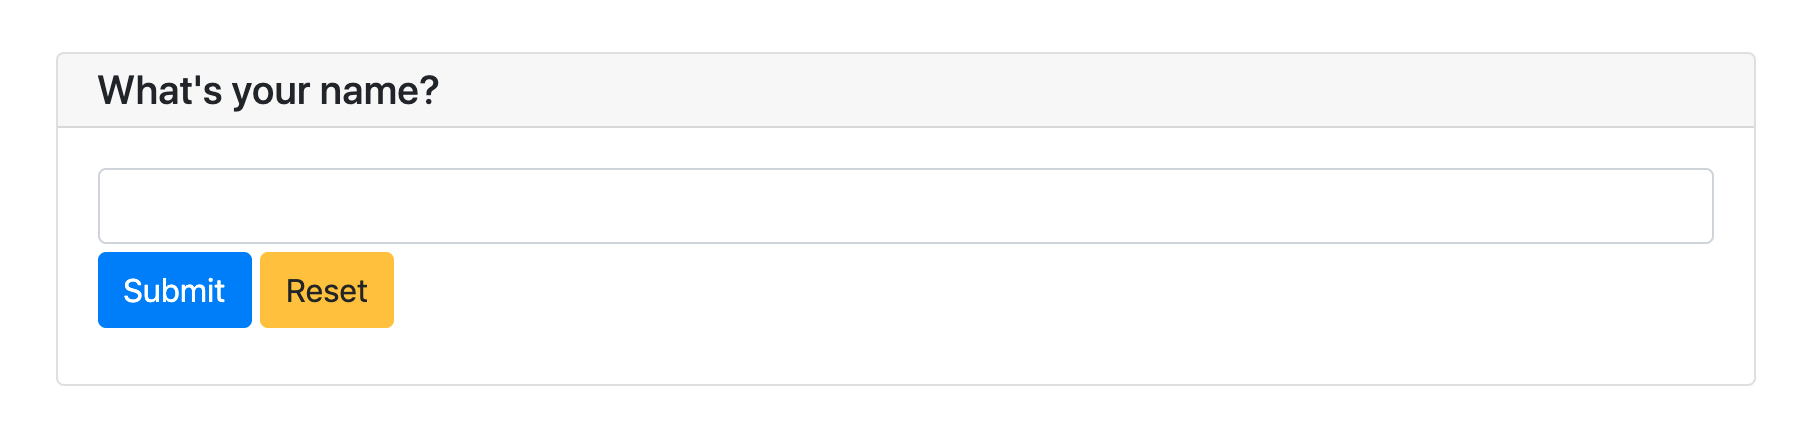
input('This is label', type=TEXT, placeholder='This is placeholder',
        help_text='This is help text', required=True)
The results of the above example are as follows:
You can specify a validation function for the input by using validate parameter. The validation function should
return None when the check passes, otherwise an error message will be returned:
def check_age(p): # return None when the check passes, otherwise return the error message
if p < 10:
return 'Too young!!'
if p > 60:
return 'Too old!!'
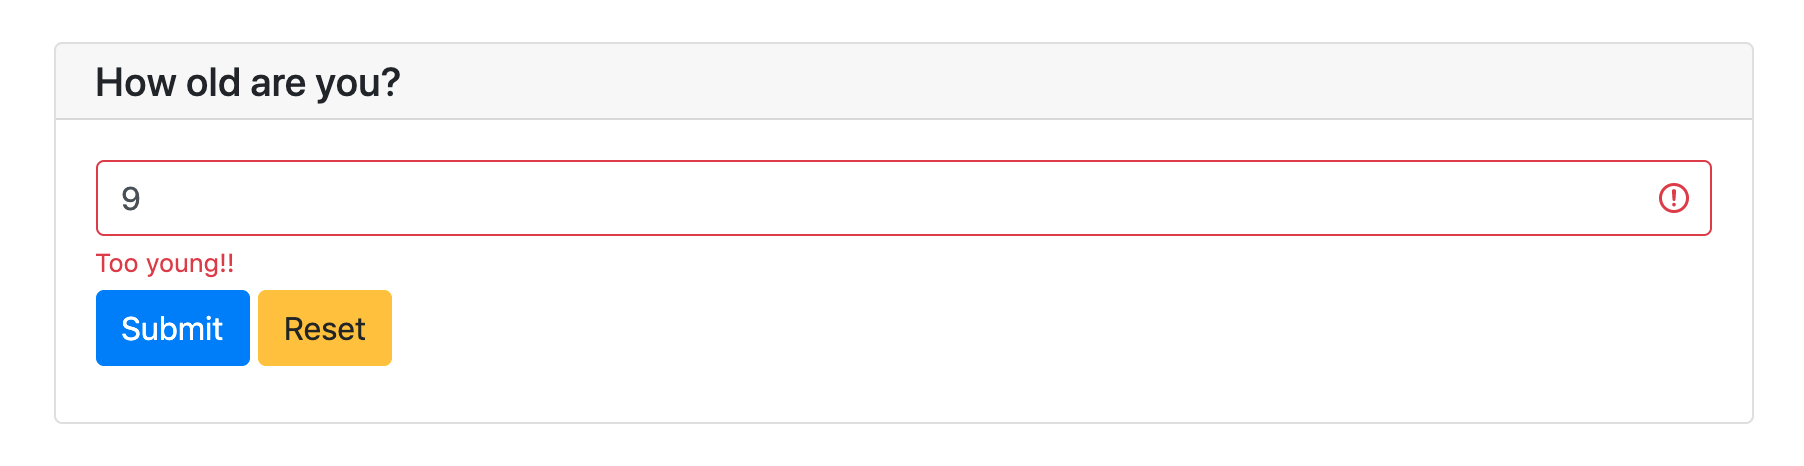
age = input("How old are you?", type=NUMBER, validate=check_age)
When the user input an illegal value, the input field is displayed as follows:
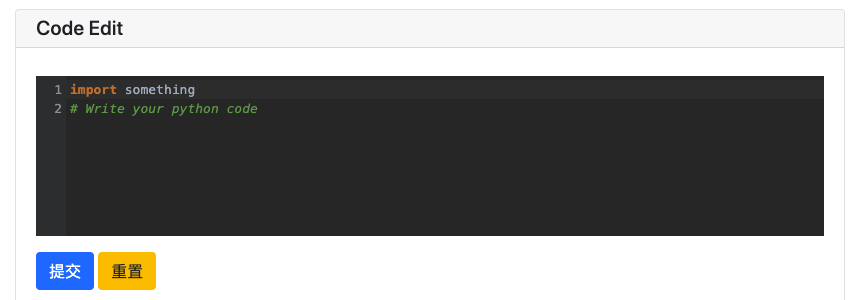
You can use code parameter in pywebio.input.textarea() to make a code editing textarea.
code = textarea('Code Edit', code={
    'mode': "python",
    'theme': 'darcula',
}, value='import something\n# Write your python code')
The results of the above example are as follows:
Input Group
PyWebIO uses input group to get multiple inputs in a single form. pywebio.input.input_group() accepts a list of
single input function call as parameter, and returns a dictionary with the name of the single input as its key
and the input data as its value:
data = input_group("Basic info",[
  input('Input your name', name='name'),
  input('Input your age', name='age', type=NUMBER, validate=check_age)
])
put_text(data['name'], data['age'])
The input group also supports using validate parameter to set the validation function, which accepts the entire form data as parameter:
def check_form(data):  # return (input name, error msg) when validation fail
    if len(data['name']) > 6:
        return ('name', 'Name too long!')
    if data['age'] <= 0:
        return ('age', 'Age can not be negative!')
Attention
PyWebIO determines whether the input function is in input_group() or is called alone according to whether the
name parameter is passed. So when calling an input function alone, do not set the name parameter;
when calling the input function in input_group(), you must provide the name parameter.
Output
The output functions are all defined in the pywebio.output module and can be imported using
from pywebio.output import *.
When output functions is called, the content will be output to the browser in real time. The output functions can be called at any time during the application lifetime.
Basic Output
Using output functions, you can output a variety of content, such as text, tables, images and so on:
# Text Output
put_text("Hello world!")

# Table Output
put_table([
    ['Commodity', 'Price'],
    ['Apple', '5.5'],
    ['Banana', '7'],
])

# Image Output
put_image(open('/path/to/some/image.png', 'rb').read())  # local image
put_image('http://example.com/some-image.png')  # internet image

# Markdown Output
put_markdown('~~Strikethrough~~')

# File Output
put_file('hello_word.txt', b'hello word!')

# Show a PopUp
popup('popup title', 'popup text content')

# Show a notification message
toast('New message 🔔')
For all output functions provided by PyWebIO, please refer to the pywebio.output module. In addition, PyWebIO also supports data visualization with some third-party libraries, see Third-party library ecology.
Note
If you use PyWebIO in interactive execution environment of Python shell, IPython or jupyter notebook,
you need call show() method explicitly to show output:
>>> put_text("Hello world!").show()
>>> put_table([
...     ['A', 'B'],
...     [put_markdown(...), put_text('C')]
... ]).show()
Combined Output
The output functions whose name starts with put_ can be combined with some output functions as part of the final output:
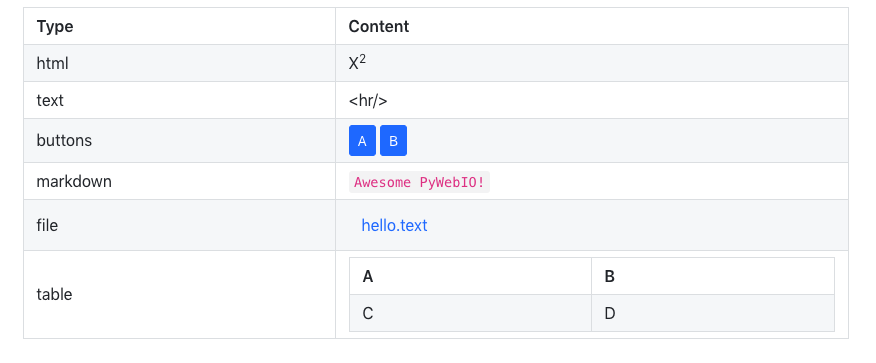
You can pass put_xxx() calls to put_table() as cell content:
put_table([
    ['Type', 'Content'],
    ['html', put_html('X<sup>2</sup>')],
    ['text', '<hr/>'],  # equal to ['text', put_text('<hr/>')]
    ['buttons', put_buttons(['A', 'B'], onclick=...)],
    ['markdown', put_markdown('`Awesome PyWebIO!`')],
    ['file', put_file('hello.text', b'hello world')],
    ['table', put_table([['A', 'B'], ['C', 'D']])]
])
The results of the above example are as follows:
Similarly, you can pass put_xxx() calls to popup() as the popup content:
popup('Popup title', [
    put_html('<h3>Popup Content</h3>'),
    'plain html: <br/>',  # Equivalent to: put_text('plain html: <br/>')
    put_table([['A', 'B'], ['C', 'D']]),
    put_button('close_popup()', onclick=close_popup)
])
In addition, you can use put_widget() to make your own output widgets that can accept put_xxx() calls.
For a full list of functions that accept put_xxx() calls as content, see Output functions list
Context Manager
Some output functions that accept put_xxx() calls as content can be used as context manager:
with put_collapse('This is title'):
    for i in range(4):
        put_text(i)

    put_table([
        ['Commodity', 'Price'],
        ['Apple', '5.5'],
        ['Banana', '7'],
    ])
For a full list of functions that support context manager, see Output functions list
Click Callback
As we can see from the above, the interaction of PyWebIO has two parts: input and output. The input function of PyWebIO is blocking, a form will be displayed on the user’s web browser when calling input function, the input function will not return until the user submits the form. The output function is used to output content to the browser in real time. The input and output behavior of PyWebIO is consistent with the console program. That’s why we say PyWebIO turning the browser into a “rich text terminal”. So you can write PyWebIO applications in script programming way.
In addition, PyWebIO also supports event callbacks: PyWebIO allows you to output some buttons and bind callbacks to them. The provided callback function will be executed when the button is clicked.
This is an example:
from functools import partial

def edit_row(choice, row):
    put_text("You click %s button ar row %s" % (choice, row))

put_table([
    ['Idx', 'Actions'],
    [1, put_buttons(['edit', 'delete'], onclick=partial(edit_row, row=1))],
    [2, put_buttons(['edit', 'delete'], onclick=partial(edit_row, row=2))],
    [3, put_buttons(['edit', 'delete'], onclick=partial(edit_row, row=3))],
])
The call to put_table() will not block. When user clicks a button, the corresponding
callback function will be invoked:
Of course, PyWebIO also supports outputting individual button:
def btn_click(btn_val):
    put_text("You click %s button" % btn_val)

put_buttons(['A', 'B', 'C'], onclick=btn_click)  # a group of buttons

put_button("Click me", onclick=lambda: toast("Clicked"))  # single button
In fact, all output can be bound to click events, not just buttons. You can call onclick() method after the output
function (function name like put_xxx()) call:
put_image('some-image.png').onclick(lambda: toast('You click an image'))

# set onclick in combined output
put_table([
    ['Commodity', 'Price'],
    ['Apple', put_text('5.5').onclick(lambda: toast('You click the text'))],
])
The return value of onclick() method is the object itself so it can be used in combined output.
Output Scope
PyWebIO uses the scope model to give more control to the location of content output. The output scope is a container of output content. You can create a scope in somewhere and append content to it.
Each output function (function name like put_xxx()) will output its content to a scope, the default is “current scope”.
The “current scope” is set by use_scope().
use_scope()
You can use use_scope() to open and enter a new output scope, or enter an existing output scope:
with use_scope('scope1'):  # open and enter a new output: 'scope1'
    put_text('text1 in scope1')  # output text to scope1

put_text('text in parent scope of scope1')  # output text to ROOT scope

with use_scope('scope1'):  # enter an existing scope: 'scope1'
    put_text('text2 in scope1')  # output text to scope1
The results of the above code are as follows:
text1 in scope1
text2 in scope1
text in parent scope of scope1
You can use clear parameter in use_scope() to clear the existing content before entering the scope:
with use_scope('scope2'):
    put_text('create scope2')

put_text('text in parent scope of scope2')

with use_scope('scope2', clear=True):  # enter the existing scope and clear the previous content
    put_text('text in scope2')
The results of the above code are as follows:
text in scope2
text in parent scope of scope2
use_scope() can also be used as decorator:
from datetime import datetime

@use_scope('time', clear=True)
def show_time():
    put_text(datetime.now())
When calling show_time() for the first time, a time scope will be created, and the current time will be output
to it. And then every time the show_time() is called, the new content will replace the previous content.
Scopes can be nested. At the beginning, PyWebIO applications have only one ROOT scope.
You can create new scope in a scope. For example, the following code will create 3 scopes:
with use_scope('A'):
    put_text('Text in scope A')

    with use_scope('B'):
        put_text('Text in scope B')

with use_scope('C'):
    put_text('Text in scope C')
The above code will generate the following scope layout:
┌─ROOT────────────────────┐
│                         │
│ ┌─A───────────────────┐ │
│ │ Text in scope A     │ │
│ │ ┌─B───────────────┐ │ │
│ │ │ Text in scope B │ │ │
│ │ └─────────────────┘ │ │
│ └─────────────────────┘ │
│                         │
│ ┌─C───────────────────┐ │
│ │ Text in scope C     │ │
│ └─────────────────────┘ │
└─────────────────────────┘
put_scope()
We already know that the scope is a container of output content. So can we use this container as a sub-item
of a output (like, set a cell in table as a container)? Yes, you can use put_scope() to
create a scope explicitly.
The function name starts with put_, which means it can be pass to the functions that accept put_xxx() calls.
put_table([
    ['Name', 'Hobbies'],
    ['Tom', put_scope('hobby', content=put_text('Coding'))]  # hobby is initialized to coding
])

with use_scope('hobby', clear=True):
    put_text('Movie')  # hobby is reset to Movie

# append Music, Drama to hobby
with use_scope('hobby'):
    put_text('Music')
    put_text('Drama')

# insert the Coding into the top of the hobby
put_markdown('**Coding**', scope='hobby', position=0)
Caution
It is not allowed to have two scopes with the same name in the application.
Scope control
In addition to use_scope() and put_scope(),
PyWebIO also provides the following scope control functions:
clear(scope): Clear the contents of the scoperemove(scope): Remove scopescroll_to(scope): Scroll the page to the scope
Also, all output functions (function name like put_xxx()) support a scope parameter to specify the destination
scope to output, and support a position parameter to specify the insert position in target scope.
Refer output module for more information.
Layout
In general, using the output functions introduced above is enough to output what you want, but these outputs are arranged vertically. If you want to create a more complex layout (such as displaying a code block on the left side of the page and an image on the right), you need to use layout functions.
The pywebio.output module provides 3 layout functions, and you can create complex layouts by combining them:
put_row(): Use row layout to output content. The content is arranged horizontallyput_column(): Use column layout to output content. The content is arranged verticallyput_grid(): Output content using grid layout
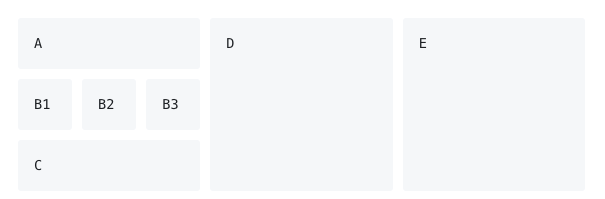
Here is an example by combining put_row() and put_column():
put_row([
    put_column([
        put_code('A'),
        put_row([
            put_code('B1'), None,  # None represents the space between the output
            put_code('B2'), None,
            put_code('B3'),
        ]),
        put_code('C'),
    ]), None,
    put_code('D'), None,
    put_code('E')
])
The results of the above example are as follows:
The layout function also supports customizing the size of each part:
put_row([put_image(...), put_image(...)], size='40% 60%') # The ratio of the width of two images is 2:3
For more information, please refer to the layout functions documentation.
Style
If you are familiar with CSS styles,
you can use the style() method of output return to set a custom style for the output.
You can set the CSS style for a single put_xxx() output:
put_text('hello').style('color: red; font-size: 20px')

# in combined output
put_row([
    put_text('hello').style('color: red'),
    put_markdown('markdown')
]).style('margin-top: 20px')
The return value of style() method is the object itself so it can be used in combined output.
Run application
In PyWebIO, there are two modes to run PyWebIO applications: running as a script and using
pywebio.start_server() or
pywebio.platform.path_deploy() to run as a web service.
Overview
Server mode
In server mode, PyWebIO will start a web server to continuously provide services. When the user accesses the service address, PyWebIO will open a new session and run PyWebIO application in it.
start_server() is the most common way to start a web server to serve given
PyWebIO applications:
from pywebio import *

def main():  # PyWebIO application function
    name = input.input("what's your name")
    output.put_text("hello", name)

start_server(main, port=8080, debug=True)
Now head over to http://127.0.0.1:8080/, and you should see your hello greeting.
By using debug=True to enable debug mode, the server will automatically reload if code changes.
The start_server() provide a remote access support, when enabled
(by passing remote_access=True to start_server()), you will get a public, shareable address for the current
application, others can access your application in their browser via this address. Because the processing happens
on your device (as long as your device stays on!), you don’t have to worry about any dependencies.
Using remote access makes it easy to temporarily share the application with others.
Another way to deploy PyWebIO application as web service is using path_deploy().
path_deploy() is used to deploy the PyWebIO applications from a directory.
Just define PyWebIO applications in python files under this directory, and you can access them via the path in the URL.
Refer to platform module for more information.
Attention
Note that in Server mode, all functions from pywebio.input, pywebio.output and pywebio.session modules can only be called in
the context of PyWebIO application functions. For example, the following code is not allowed:
import pywebio
from pywebio.input import input

port = input('Input port number:')   # ❌ error
pywebio.start_server(my_task_func, port=int(port))
Script mode
If you never call start_server() or path_deploy() in your code, then you are running PyWebIO application as script mode.
In script mode, a web browser page will be open automatically when running to the first call to PyWebIO interactive functions, and all subsequent PyWebIO interactions will take place on this page. When the script exit, the page will be inactive.
If the user closes the browser before the script exiting, then subsequent calls to PyWebIO’s interactive functions
will cause a SessionException exception.
Concurrent
PyWebIO can be used in a multi-threading environment.
Script mode
In script mode, you can freely start new thread and call PyWebIO interactive functions in it. When all non-daemonic threads finish running, the script exits.
Server mode
In server mode, if you need to use PyWebIO interactive functions in new thread, you need to use
pywebio.session.register_thread(thread) to register the new thread
(so that PyWebIO can know which session the thread belongs to). If the PyWebIO interactive function is not used in
the new thread, no registration is required. Threads that are not registered with
register_thread(thread) calling PyWebIO’s interactive functions will cause
SessionNotFoundException.
Example of using multi-threading in Server mode:
def show_time():
    while True:
        with use_scope(name='time', clear=True):
            put_text(datetime.datetime.now())
            time.sleep(1)

def app():
    t = threading.Thread(target=show_time)
    register_thread(t)
    put_markdown('## Clock')
    t.start()  # run `show_time()` in background

    # ❌ this thread will cause `SessionNotFoundException`
    threading.Thread(target=show_time).start()

    put_text('Background task started.')


start_server(app, port=8080, debug=True)
Close of session
When user close the browser page, the session will be closed. After the browser page is closed, PyWebIO input function
calls that have not yet returned in the current session will cause SessionClosedException,
and subsequent calls to PyWebIO interactive functions will cause SessionNotFoundException
or SessionClosedException.
In most cases, you don’t need to catch those exceptions, because let those exceptions to abort the running is the right way to exit.
You can use pywebio.session.defer_call(func) to set the function to be called when the
session closes. defer_call(func) can be used for resource cleaning. You can call
defer_call(func) multiple times in the session, and the set functions will be executed
sequentially after the session closes.
More about PyWebIO
By now, you already get the most important features of PyWebIO and can start to write awesome PyWebIO applications. However, there are some other useful features we don’t cover in the above. Here we just make a briefly explain about them. When you need them in your application, you can refer to their document.
Also, here is a cookbook where you can find some useful code snippets for your PyWebIO application.
session module
The pywebio.session module give you more control to session.
Use
set_env()to configure the title, page appearance, input panel and so on for current session.The
infoobject provides a lot information about the current session, such as the user IP address, user language and user browser information.
localis a session-local storage, it used to save data whose values are session specific.
run_js()let you execute JavaScript code in user’s browser, andeval_js()let you execute JavaScript expression and get the value of it.
pin module
As you already know, the input function of PyWebIO is blocking and the input form will be destroyed after successful submission. In some cases, you may want to make the input form not disappear after submission, and can continue to receive input. So PyWebIO provides the pywebio.pin module to achieve persistent input by pinning input widgets to the page.
platform module
The pywebio.platform module provides support for deploying PyWebIO applications in different ways.
There are two protocols (WebSocket and HTTP) can be used in server to communicates with the browser. The WebSocket is
used by default. If you want to use HTTP protocol, you can choose other start_server() functions in this module.
You might want to set some web page related configuration (such as SEO information, js and css injection) for your PyWebIO application,
pywebio.config() can be helpful.
Advanced features
The PyWebIO application can be integrated into an existing Python web project, the PyWebIO application and the web project share a web framework. Refer to Advanced Topic: Integration with Web Framework for more information.
PyWebIO also provides support for coroutine-based sessions. Refer to Advanced Topic: Coroutine-based session for more information.
If you try to bundles your PyWebIO application into a stand-alone executable file, to make users can run the application without installing a Python interpreter or any modules, you might want to refer to Libraries support: Build stand-alone App
If you want to make some data visualization in your PyWebIO application, you can’t miss Libraries support: Data visualization
Last but not least
This is basically all features of PyWebIO, you can continue to read the rest of the documents, or start writing your PyWebIO applications now.
Finally, please allow me to provide one more suggestion. When you encounter a design problem when using PyWebIO, you can ask yourself a question: What would I do if it is in a terminal program? If you already have the answer, it can be done in the same way with PyWebIO. If the problem persists or the solution is not good enough, you can consider the callback mechanism or pin module.
OK, Have fun with PyWebIO!